Thursday, November 7, 2013

Twist - Exploring the Cube and its Faces


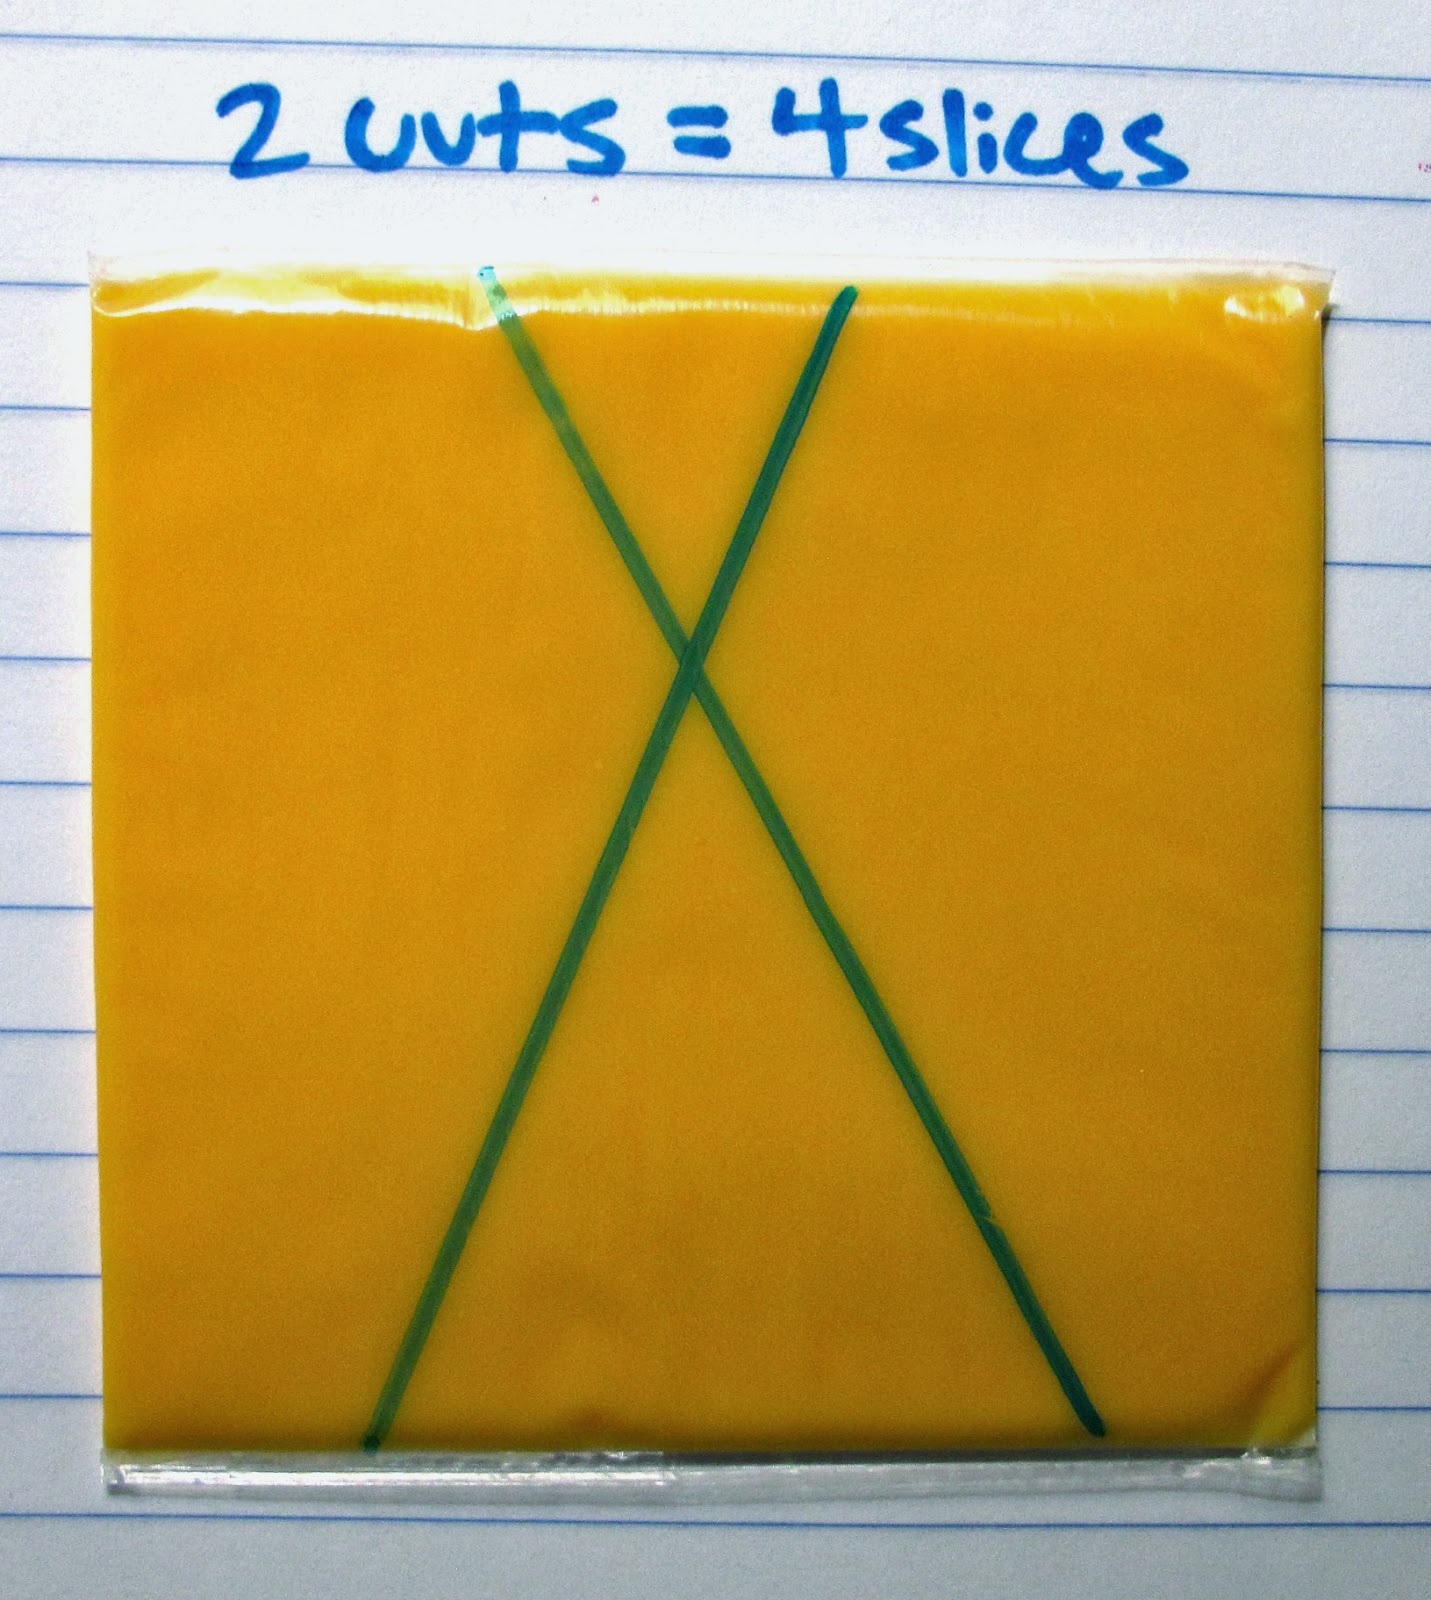
A recent sculptural undertaking of mine - although it may not seem like it at first, this tangled mess is actually based upon the cube. It's made of 24 empty pen barrels, tied together with rubber bands. There are six square faces, two of each color (the faces of the same color are parallel). Essentially, it is what I think would happen if you took a cube, pushed its square sides inward, and gave them a twist. Below is a single square face -


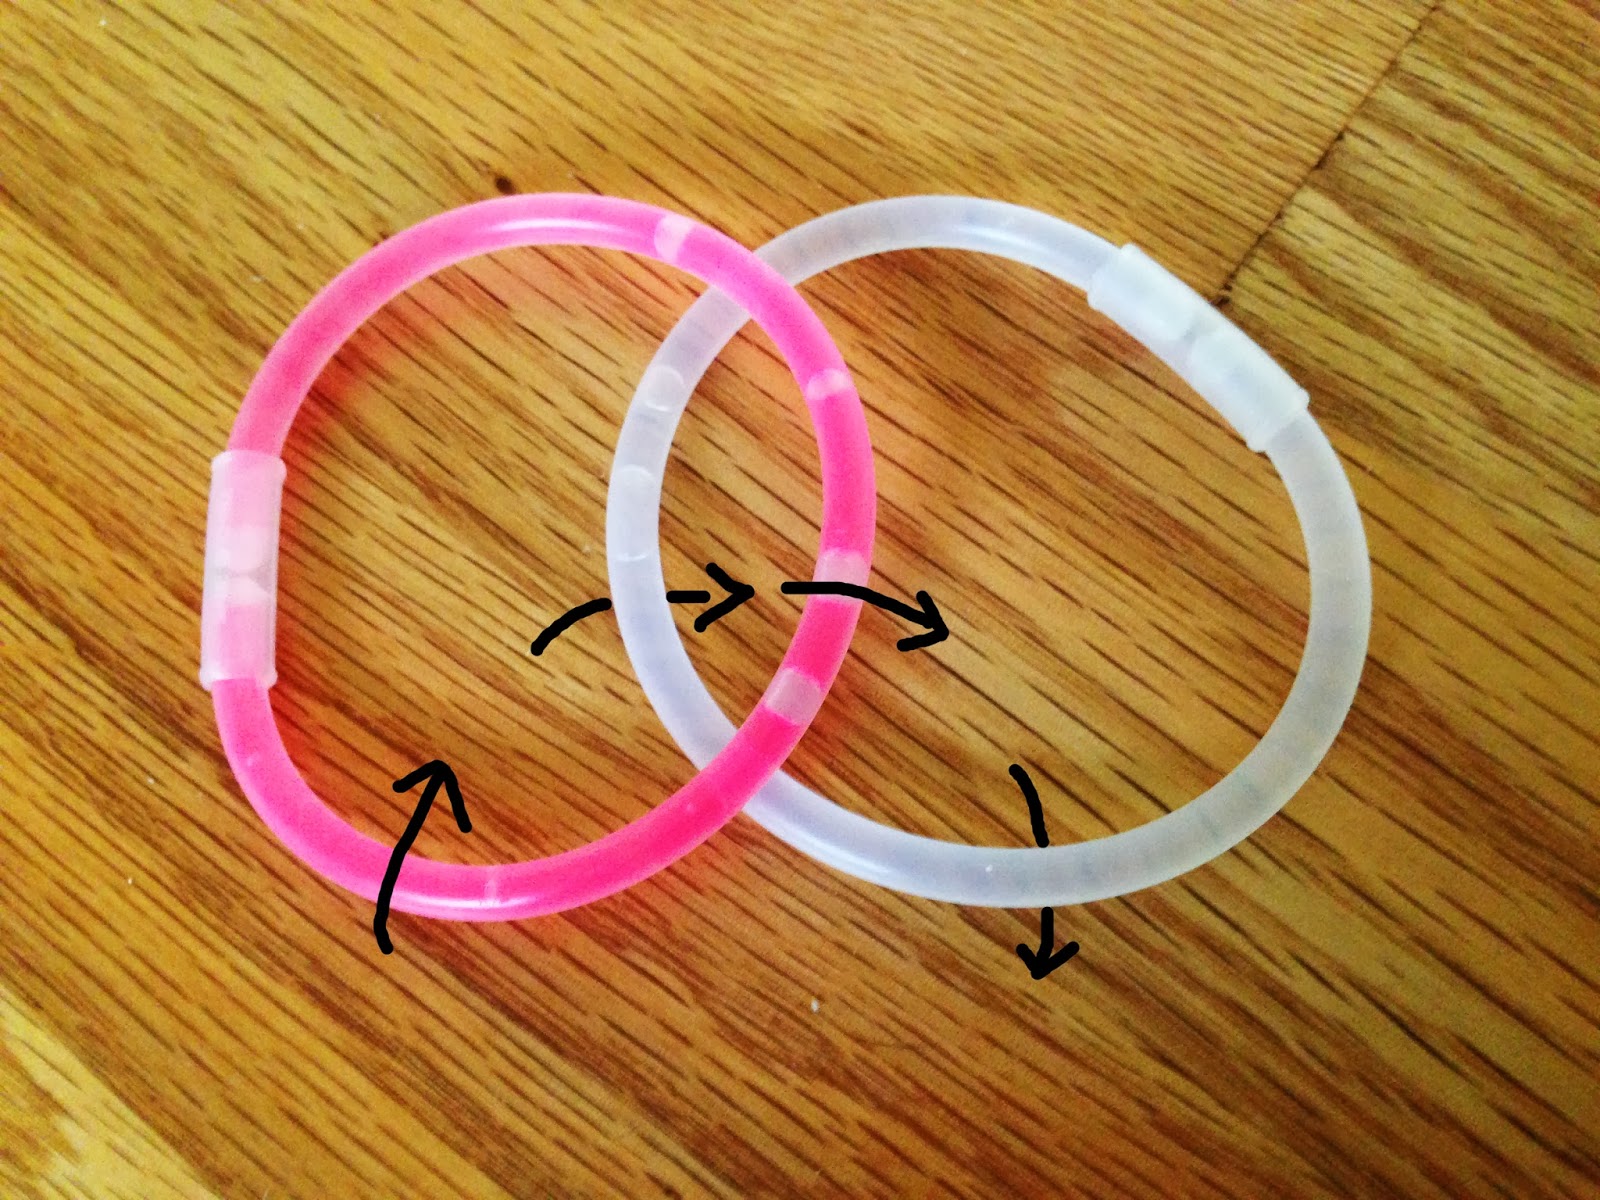
Then, each of the three pairs of faces are arranged with a π/4 twist, which looks like this when viewed face on -


This arrangement makes eight convenient slots where the other four faces can interlock, as shown here. The darker/opaque green and purple dots indicate how the green and purple squares fit into the blue ones. Imagine that the set of green faces and the set of purple faces both also have a half twist to them. Also, the lighter green and purple dots on the intersection of the green and purple pieces drawn indicate the corners of the faces (the green dots on the purple pieces means the green overlaps there and two green sides come together at that point as a corner, and vice versa for the purple dots on the green pieces). You can actually see this a bit in the first picture of the actual sculpture, where the green and blue faces are held in place by the purple, and how the corners of the blue and green meet up and overlap.


If you turned the piece around, you would see this arrangement three times, once with each color serving as the outer "framework" as the blue is shown here. This was actually quite challenging to assemble, as it became a feat of intense coordination to hold everything together before it was all tied in place, but finished up, it pretty much holds itself together now. I made each of the squares smaller to tighten up the structure and I like how the ends sticking out at each corner give the whole thing a messier look - a curious juxtaposition of order and chaos.

Saturday, November 2, 2013

Borromean Glow Stick Bracelets

As a (slightly belated) Halloween post, here's a cool thing you can do with glow stick bracelets (or really anything, I just happen to have a lot of these now) -


Check it out! This arrangement is known as the Borromean rings and is particularly interesting because no two rings are actually linked to each other, yet all three together are linked. They can be worn like so in a nice, mathematically interesting bracelet.


Putting these rings together is fantastically simple. First take two bracelets (or other circular objects of your choice) and overlap one on the other like so.


Then, take the third bracelet and weave it through the other two, alternating over and under as you come around. 


Then simply connect up the two ends of the third bracelet and voila!


If you look closely, you'll find some other neat properties. For example, if you were to cut the Borromean rings, you would get one iteration of the standard three-strand braid, suggesting an alternate method of construction. Just as if you were to remove one strand of a braid and cause it to fall apart, you can try and take out one ring and see that the other two are no longer linked. 

Also notice how if you look at any one ring, it is wholly inside of, and wholly outside of, the other two rings.


Alternatively, you could dip your rings into some bubble solution. The result is one of a class of objects called Seifert surfaces, any surface defined by a knot or link. Here is a beautiful sculpture of this surface (image source


And just think, all of this from three simple rings... 
 
"I'm just playing. That's what math is - wondering, playing, amusing yourself with your imagination." - Paul Lockhart

Wednesday, October 23, 2013

An Afterthought on Tessellations


Check out this awesome tiling I saw today - this place had its floor tiles cut like Escher's lizard tessellations! 

The four types of tessellations - translations, reflections, rotations, and glide reflections

Tuesday, October 22, 2013

Food for Thought

Here's a thought - take a slice of cheese. With n number of cuts, what is the maximum number of pieces  you could cut your cheese into? Observe...


Notice how as we add each cut, starting at 0 cuts with 1 slice, we get 1, 2, 4, 7, 11... 


A lovely pattern can be seen in the maximum number of pieces you get where you take the previous number and add 1, then 2, then 3, then 4... perhaps more familiarly as the triangular numbers + 1 or n(n+1)/2 + 1

Continuing with that thought, what would happen if you extended this problem to say, a block of cheese? (going from 2D to 3D). Given a certain number of planar cuts, what is the maximum number of pieces you can create? With 2D cheese, when adding a cut, to maximize the number of pieces you get, your line has to cut through each of the existing cuts/lines. The same is true in the case of 3D cheese, in that each new plane must cut all of the existing planes. The following pattern emerges: 


Notice how with 2D cheese, each time you were adding 1, then 2, 3, etc. but then in 3D cheese, the numbers your adding each time are the numbers of pieces per cut from the 2D cheese problem. With the previous formula, you can derive the following pattern in 3D: (n^3+5n+6)/6

Additional notes: 
  • This is actually called the lazy caterer's sequence in 2D and cake numbers in 3D 
  • It's pretty cool how for n dimensions, the first n slices will be consecutive powers of 2, and the next one will be 2^(n+1)-1
  • For any given number of slices, can you cut the 2D or 3D cheese into equally sized pieces? If so, how, and if not, why not? (I actually have no idea) 

Monday, October 7, 2013

Twisted Tessellations IV - Glide Reflection

Original artwork by M. C. Escher - image source.  To finish off the series of tessellation posts (see translation, reflection, and rotation for more), here's in my opinion the coolest one - glide reflections. It is, like it sounds, a combination of flipping and sliding; notice how here you could take one of the white knights, flip it, and slide it to get to a grey knight. 


Step 1 - Take your square, draw your usual squiggly bit on one side and cut out. 

Step 2 - Flip the piece over and attach to the opposite side. 


Step 3 - Choose one of the two untouched sides, draw another squiggle and cut out. 

Step 4 - Flip it over and attach to the opposite side like you did with the first piece in Step 2. Now your lovely tessellation is ready to trace! 

This one is possibly the hardest of the four to trace because it involves a lot of flipping and fitting squiggly bits together, but if you chose to use paper that has different colors on each side, you can think when you traced the first shape (see the picture for Step 4), the top edge was the red edge with the triangle poking out, so when you flip the piece over, you'd align the piece so the red edge with the space for the triangle would be on the bottom. 

It takes a bit of practice, but the results are quite pretty! 

Further exploration - 
  • I happened to use squares as the base shape, but you can definitely use others too - triangles are nice, so are rhombuses. 
    • That said, can you start with any shape? 
  • These tessellations were all done with only one shape, but can you do something with two, three, four, etc. shapes? 

Mathspiration

Basically, I found this tonight and it deserves way more views than it has. It's pretty awesome.

Tuesday, October 1, 2013

Twisted Tessellations III - Rotation

Original artwork by M. C. Escher (can you tell I have an Escher obsession?) Image source. A third type of tessellation (in addition to translations and reflections) is rotation, where instead of sliding or flipping the pattern, you spin it about a pivot point. 


Step 1 - Starting again with a square, mark off the midpoint on one of the edges, and draw and cut out any pattern or squiggle you'd like, starting at either corner and going to the midpoint. 

Step 2 - Give the square a quarter turn and, using the piece you just cut out as a stencil, trace and cut out the same piece from the new side, making sure you stay consistent with the first edge (i.e. if you started cutting from the left corner, don't switch to starting from the right corner). Repeat with the remaining two sides.


Step 3 - Now you should have four identical squiggly pieces cut out. On each edge of the square, there is one half that wasn't cut - position the four pieces on the uncut half as shown. If you've done it correctly, you should be able to hold the midpoint and pivot the piece about that point until it fits back into where it was cut from. 

Step 4 - Tape the pieces accordingly and now your shape is ready to trace!

Can you see how this tessellation is both a rotation and a translation? 

Sunday, September 22, 2013

Triquetras, Trefoils, and Topological Awesomeness

Here is a pretty awesome piece of mathematically interesting art I saw the other day. 

This shape is called a triquetra. The name comes from the Latin tri- meaning "three" and quetrus meaning "cornered." 

It is analogous to the trefoil knot - what you get when you tie a simple overhand knot and join the two ends. 

Another way to find a triquetra is to look at the intersection of three circles, like a Venn diagram. (Note that the shape formed at the very center is a Reuleaux triangle, a shape of constant width, deserving of a blog post all of its own...another day)

The triquetra is often shown interlaced with a circle and is common to Celtic art. It has many meanings throughout various religions and symbolizes things that are threefold - mind, body, soul; past, present, future; Father, Son, Holy Spirit; to name a few. 

And if that wasn't cool enough, here's another cool thing you can do - take a strip of paper, give it three half-twists, and join the two ends into a three twist Möbius strip. 

Then, cut the strip in half along the middle of the strip. After some rearranging and playing with the twists, BAM! Trefoil! How awesome is that? 

For further exploration: 
  • Draw a triquetra - link 
  • Animation of Möbius strip to trefoil knot - link
  • George Hart shows how to cut a bagel into a trefoil knot for some "mathematically correct breakfast" - link  

Images 2 and 5 from here, Image 3 from here, and Image 4 from here.

Sunday, September 15, 2013

Mathematical Broccoli


This is hands down my new favorite vegetable. It's called Romanesco broccoli and I'd seen pictures of it online (it's also mentioned in Benoit Mandelbrot's TED talk here) but never in person until tonight. Isn't it just gorgeous though? It approximates a fractal in that it is a pattern that repeats itself infinitely...or well, as far as the physical limits of broccoli allow, that is. If you were to cut off one of the little florets, it would look like a copy of the whole thing, but smaller. Also of interest is that the little buds are arranged in logarithmic spirals, and like pinecones, counting the number of spirals going one way and then going the other way results in adjacent Fibonacci numbers. 

Seriously, can we just admire how intricate and awesome this broccoli is?!


Twisted Tessellations II - Reflection

Original artwork by M. C. Escher. Image source. In addition to translations, another type of tessellation is a reflection, where a shape has been flipped about either the x or y axis. 


Step 1 - Like for translations, start with a square piece of paper. Now pick one edge, mark off the midpoint, and draw some kind of squiggle from the corner to the center point. 

Step 2 - Cut out the piece you've just drawn, flip it over, and line it up with the other half of the chosen edge. Trace and cut out. Now you'll have two little pieces that are reflections of each other. 


Step 3 - Take those two pieces and line them up on the opposite edge as shown. Trace and cut out.

Step 4 - Attach the four pieces you've cut out to the two uncut edges like so. If you've done this correctly, you'll be able to draw a line right down the middle both horizontally and vertically and have the two sides be mirror images of one another. 

Now your beautiful stencil is ready to trace! 

Notice how, because of the symmetry, it doesn't matter which side is facing up.


This pattern also has some neat rotational symmetry, but that's another story...

Saturday, September 14, 2013

Twisted Tessellations I - Translation

This delightful tessellation I found on an intricately decorated door has inspired a four-part series on drawing the various types of tessellations. The word "tessellation" comes from the Latin tessella, which is a small square tile of stone or glass used to make mosaics. Thus a tessellation is a tiling of a plane using geometric shapes with no overlaps or gaps. 

Original artwork by M. C. Escher. Image source. One type of tessellation is called a translation. Here, the shape is simply translated, or slid, across the plane and drawn again. And now, a fairly easy way to create translation tessellations of your own.  


Step 1 - Take a square piece of paper (this is a 2" x 2" square) and draw any sort of squiggle that you want. Thicker paper works better because we're going to be using it like a stencil later on; here I'm using colorful index cards. 

Step 2 - Cut out the squiggly bit. 


 Step 3 - Slide the squiggly bit down and tape it to the edge opposite the one you cut it from.  

Step 4 - Pick one of the remaining two sides and draw another squiggle. 


Step 5 - Repeat Step 3 with the second squiggly bit. 

Step 6 - Now your stencil is ready to use. Hold the shape still on a piece of paper and trace around it. 

You can now continue the pattern by sliding the whole shape up or down/left or right and lining it up with the already drawn edge and tracing again. 

This super simple method can be continued on forever and you can expand your tessellation indefinitely (or until you run out of paper, whichever comes first).