
Friday, March 28, 2014
Thursday, November 7, 2013
Twist - Exploring the Cube and its Faces

A recent sculptural undertaking of mine - although it may not seem like it at first, this tangled mess is actually based upon the cube. It's made of 24 empty pen barrels, tied together with rubber bands. There are six square faces, two of each color (the faces of the same color are parallel). Essentially, it is what I think would happen if you took a cube, pushed its square sides inward, and gave them a twist. Below is a single square face -

Then, each of the three pairs of faces are arranged with a π/4 twist, which looks like this when viewed face on -

This arrangement makes eight convenient slots where the other four faces can interlock, as shown here. The darker/opaque green and purple dots indicate how the green and purple squares fit into the blue ones. Imagine that the set of green faces and the set of purple faces both also have a half twist to them. Also, the lighter green and purple dots on the intersection of the green and purple pieces drawn indicate the corners of the faces (the green dots on the purple pieces means the green overlaps there and two green sides come together at that point as a corner, and vice versa for the purple dots on the green pieces). You can actually see this a bit in the first picture of the actual sculpture, where the green and blue faces are held in place by the purple, and how the corners of the blue and green meet up and overlap.

If you turned the piece around, you would see this arrangement three times, once with each color serving as the outer "framework" as the blue is shown here. This was actually quite challenging to assemble, as it became a feat of intense coordination to hold everything together before it was all tied in place, but finished up, it pretty much holds itself together now. I made each of the squares smaller to tighten up the structure and I like how the ends sticking out at each corner give the whole thing a messier look - a curious juxtaposition of order and chaos.
Saturday, November 2, 2013
Borromean Glow Stick Bracelets
As a (slightly belated) Halloween post, here's a cool thing you can do with glow stick bracelets (or really anything, I just happen to have a lot of these now) -

Check it out! This arrangement is known as the Borromean rings and is particularly interesting because no two rings are actually linked to each other, yet all three together are linked. They can be worn like so in a nice, mathematically interesting bracelet.


Check it out! This arrangement is known as the Borromean rings and is particularly interesting because no two rings are actually linked to each other, yet all three together are linked. They can be worn like so in a nice, mathematically interesting bracelet.
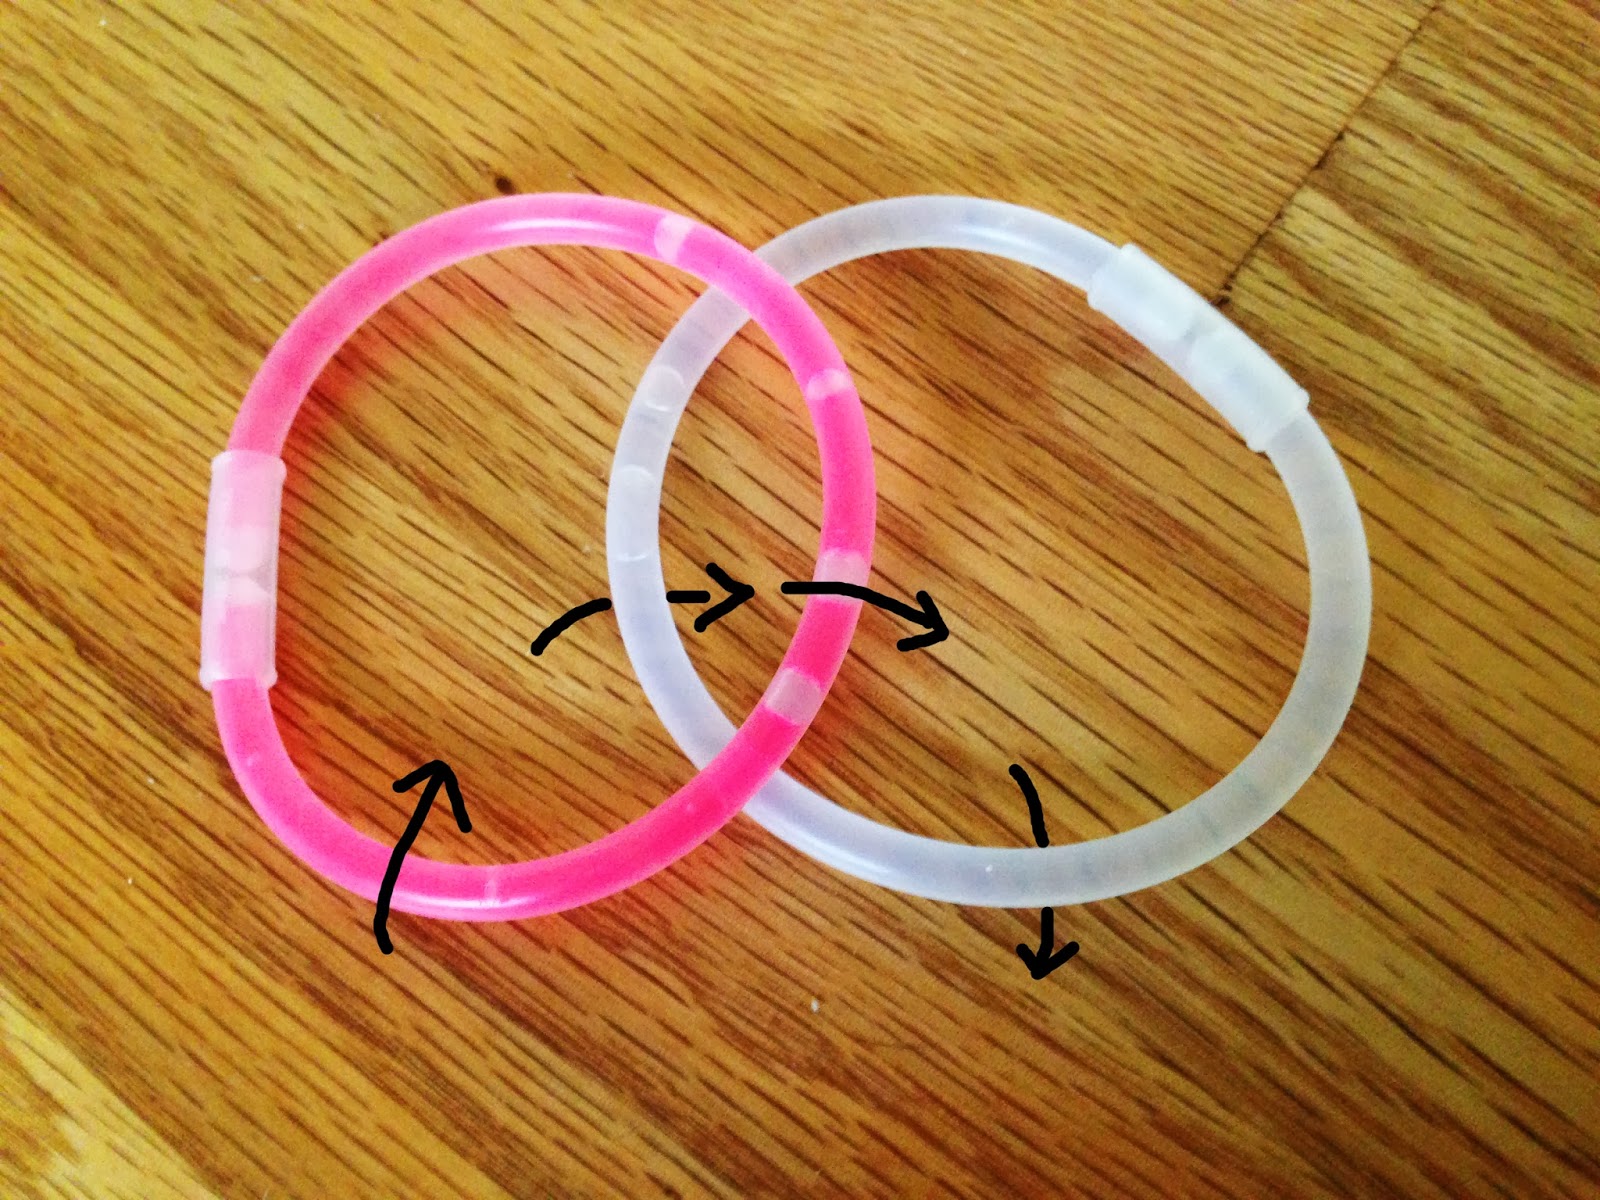
Putting these rings together is fantastically simple. First take two bracelets (or other circular objects of your choice) and overlap one on the other like so.
Then, take the third bracelet and weave it through the other two, alternating over and under as you come around.
Then simply connect up the two ends of the third bracelet and voila!
If you look closely, you'll find some other neat properties. For example, if you were to cut the Borromean rings, you would get one iteration of the standard three-strand braid, suggesting an alternate method of construction. Just as if you were to remove one strand of a braid and cause it to fall apart, you can try and take out one ring and see that the other two are no longer linked.
Also notice how if you look at any one ring, it is wholly inside of, and wholly outside of, the other two rings.

Alternatively, you could dip your rings into some bubble solution. The result is one of a class of objects called Seifert surfaces, any surface defined by a knot or link. Here is a beautiful sculpture of this surface (image source)

Alternatively, you could dip your rings into some bubble solution. The result is one of a class of objects called Seifert surfaces, any surface defined by a knot or link. Here is a beautiful sculpture of this surface (image source)
And just think, all of this from three simple rings...
"I'm just playing. That's what math is - wondering, playing, amusing yourself with your imagination." - Paul Lockhart
Wednesday, October 23, 2013
An Afterthought on Tessellations

Check out this awesome tiling I saw today - this place had its floor tiles cut like Escher's lizard tessellations!
Tuesday, October 22, 2013
Food for Thought
Here's a thought - take a slice of cheese. With n number of cuts, what is the maximum number of pieces you could cut your cheese into? Observe...


Notice how with 2D cheese, each time you were adding 1, then 2, 3, etc. but then in 3D cheese, the numbers your adding each time are the numbers of pieces per cut from the 2D cheese problem. With the previous formula, you can derive the following pattern in 3D: (n^3+5n+6)/6

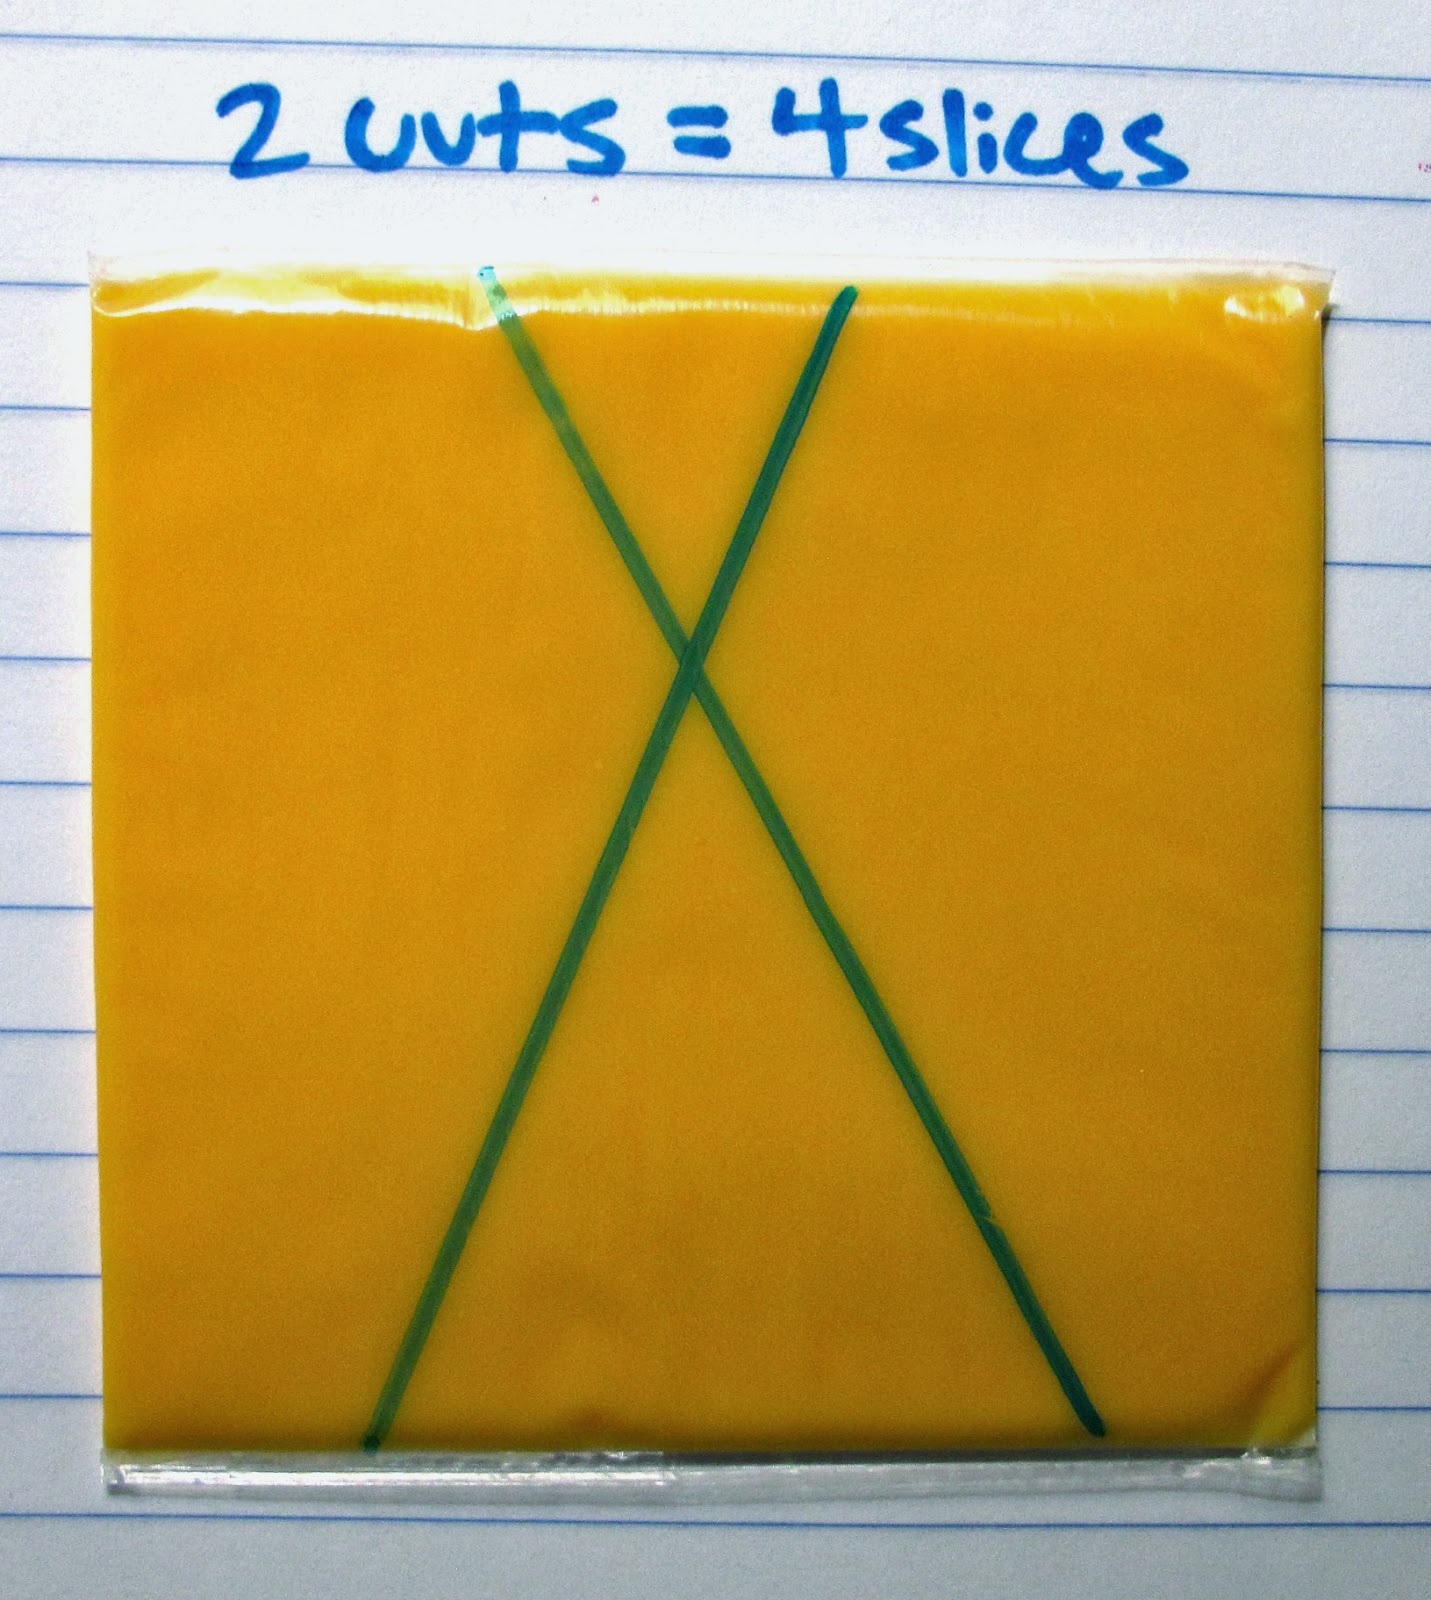


Notice how as we add each cut, starting at 0 cuts with 1 slice, we get 1, 2, 4, 7, 11...

A lovely pattern can be seen in the maximum number of pieces you get where you take the previous number and add 1, then 2, then 3, then 4... perhaps more familiarly as the triangular numbers + 1 or n(n+1)/2 + 1
Continuing with that thought, what would happen if you extended this problem to say, a block of cheese? (going from 2D to 3D). Given a certain number of planar cuts, what is the maximum number of pieces you can create? With 2D cheese, when adding a cut, to maximize the number of pieces you get, your line has to cut through each of the existing cuts/lines. The same is true in the case of 3D cheese, in that each new plane must cut all of the existing planes. The following pattern emerges:

Additional notes:
- This is actually called the lazy caterer's sequence in 2D and cake numbers in 3D
- It's pretty cool how for n dimensions, the first n slices will be consecutive powers of 2, and the next one will be 2^(n+1)-1
- For any given number of slices, can you cut the 2D or 3D cheese into equally sized pieces? If so, how, and if not, why not? (I actually have no idea)
Monday, October 7, 2013
Twisted Tessellations IV - Glide Reflection

Original artwork by M. C. Escher - image source. To finish off the series of tessellation posts (see translation, reflection, and rotation for more), here's in my opinion the coolest one - glide reflections. It is, like it sounds, a combination of flipping and sliding; notice how here you could take one of the white knights, flip it, and slide it to get to a grey knight.


Step 1 - Take your square, draw your usual squiggly bit on one side and cut out.
Step 2 - Flip the piece over and attach to the opposite side.


Step 3 - Choose one of the two untouched sides, draw another squiggle and cut out.
Step 4 - Flip it over and attach to the opposite side like you did with the first piece in Step 2. Now your lovely tessellation is ready to trace!

This one is possibly the hardest of the four to trace because it involves a lot of flipping and fitting squiggly bits together, but if you chose to use paper that has different colors on each side, you can think when you traced the first shape (see the picture for Step 4), the top edge was the red edge with the triangle poking out, so when you flip the piece over, you'd align the piece so the red edge with the space for the triangle would be on the bottom.

It takes a bit of practice, but the results are quite pretty!
Further exploration -
- I happened to use squares as the base shape, but you can definitely use others too - triangles are nice, so are rhombuses.
- That said, can you start with any shape?
- These tessellations were all done with only one shape, but can you do something with two, three, four, etc. shapes?
Mathspiration
Basically, I found this tonight and it deserves way more views than it has. It's pretty awesome.
Subscribe to:
Comments (Atom)